State Designer
Asset Store Link: State Designer
About
State Designer is an asset that assists in the creation of AI behavior logic using state machines. A state machine is a programming design pattern where computer controlled AI agents execute logic based off their current "state." Depending on certain conditions defined by the developer, the agents can transition to other states. State Designer provides a visual interface for creating these state machines.
State Designer shares many similarities with its predecessor, Behavior Designer Pro, created by the same developer, Opsive. State Designer uses the same graph interface as Behavior Designer Pro and the code architecture quite similar. I previously created an integration for Behavior Designer Pro in DOTS Survivors by creating two new enemy types. I was able to replicate the behavior of these two enemies types using State Designer fairly seamlessly.
In this article, I will be detailing how State Designer was used to create these new enemy types for DOTS Survivors. As much of this logic is shared with Behavior Designer Pro, I would recommend reading through that article to see how the two compare.
Although State Designer and Behavior Designer Pro are similar, they both have cases where one should be used over the other. If you want some more information on the differences between these two assets, check out the interview I recently did with Justin, the creator of State Designer and Behavior Designer Pro:
Unity DOTS State Machines - The Hot Path Show Ep. 58
Setup
- Download and import the latest version of State Designer from the Unity Asset Store
- Import all project files aside from the Samples directory
- If you are using a custom assembly definition, add a reference to
Opsive.StateDesigner.Runtimein your assembly definition asset to reference the State Designer API from your game code.- The DOTS Survivors assembly definition is located at:
Assets\DOTSSurvivors\Scripts\DOTSSurvivors.asmdef
- The DOTS Survivors assembly definition is located at:
- Visit the State Designer Documentation Site to understand the basics of state machines and how to use this asset
Note
If you wish to use the State Designer integrations developed for DOTS Survivors, extract the .unitypackage file located at: Assets\DOTSSurvivors\Integrations\StateDesigner.unitypackage
IMPORTANT: doing this will overwrite the following files:
- EnemyType.cs
- Spawn Wave ScriptableObjects:
- EnemySpawnWave-4.asset
- EnemySpawnWave-7.asset
- EnemySpawnWave-9.asset
- EnemySpawnWave-12.asset
- EnemySpawnWave-19.asset
Be sure you have a backup of these files if you made any modifications to them.
Usage in DOTS Survivors
As mentioned above, I have already used Behavior Designer Pro to create two new enemy types for DOTS Survivors. I wanted these enemy types to be a bit more interesting than the standard "chase the player and deal damage on contact." So I created one enemy that explodes and deals damage in an area, and another that will shoot projectiles towards the player.
When talking with Justin, the developer of these two assets, he let me know that it would be quite easy to transfer over the logic from Behavior Designer Pro to State Designer. So I did exactly that.
Note
To avoid confusion and namespace conflicts, I have created all the action and conditional nodes in State Designer with a similar name to those in the Behavior Designer Pro asset; however, they will often include the word "State" in the names.
Exploding UFO Enemy
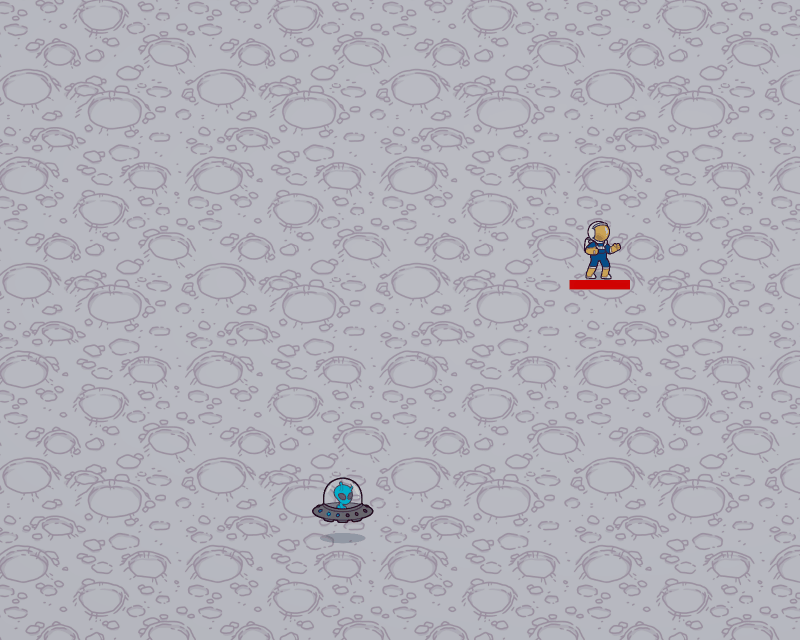
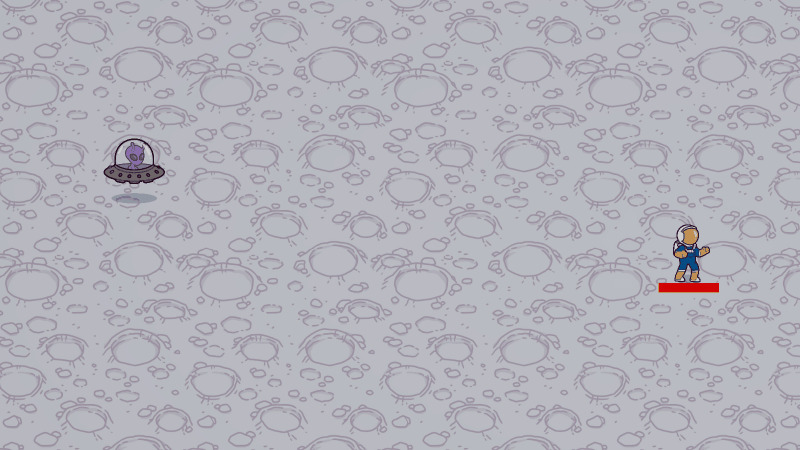
The first enemy type I created was one that moves towards the player and explodes when it is within a certain range of the player. To give the player a bit of a warning as to when it will explode, it goes through two brief phases of flashing to signal to the player it is about to deal damage.
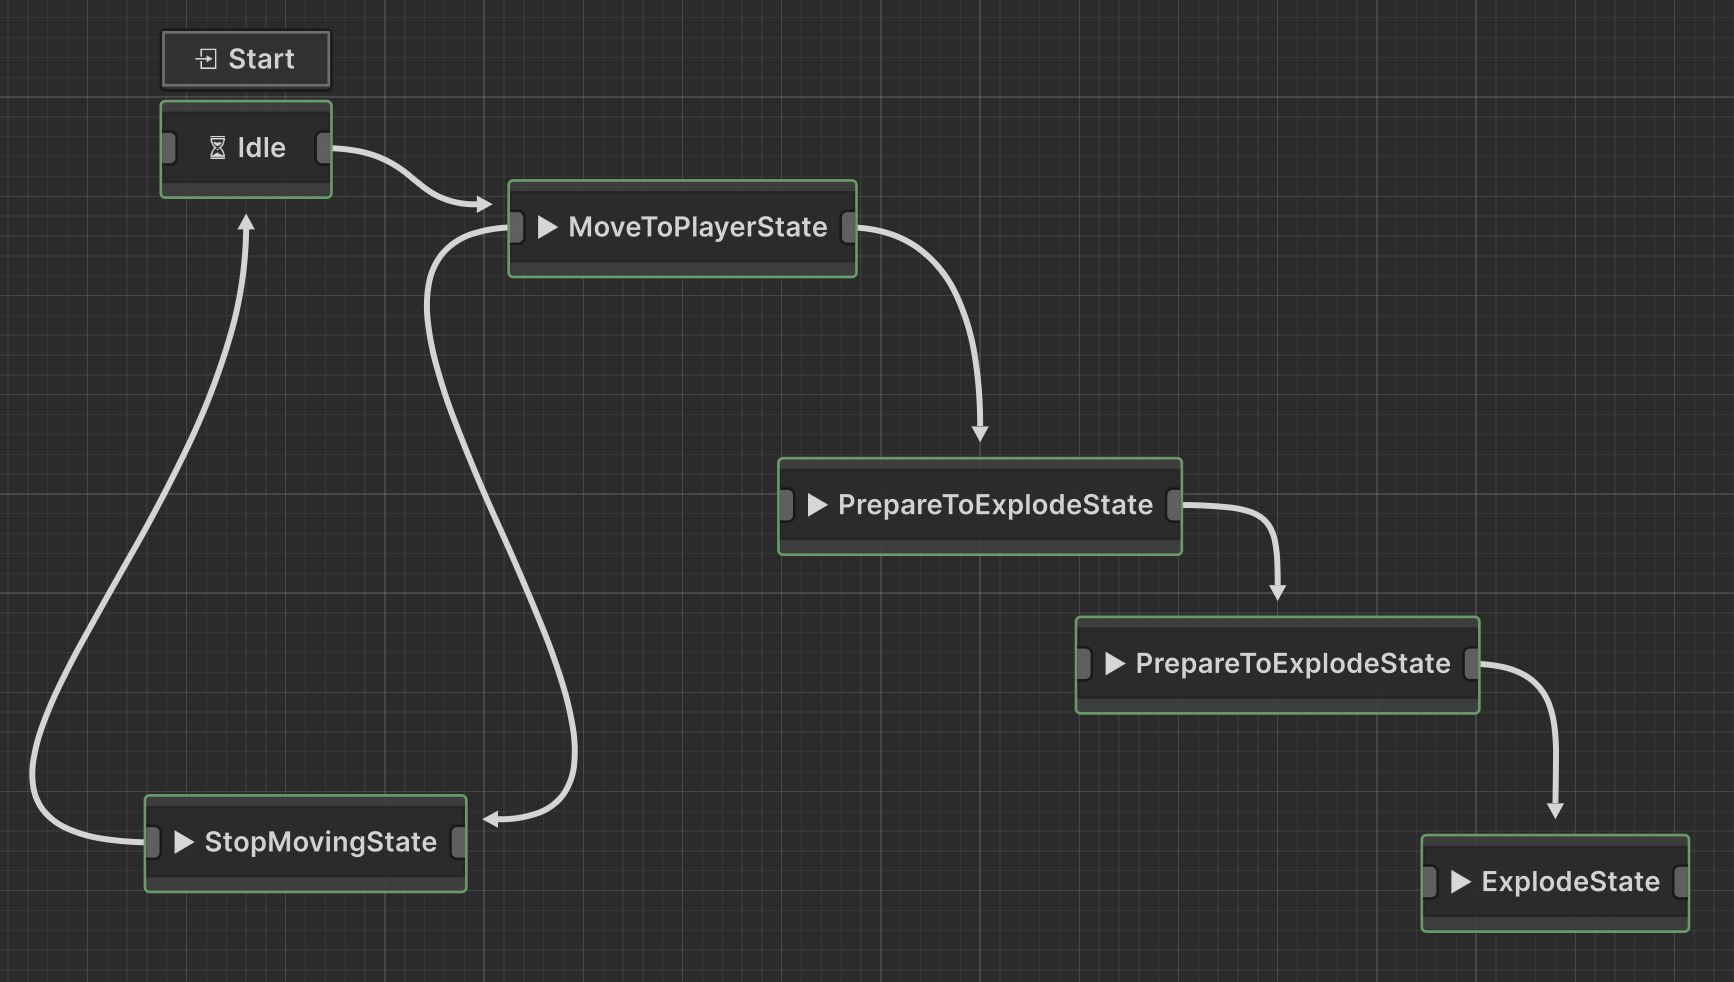
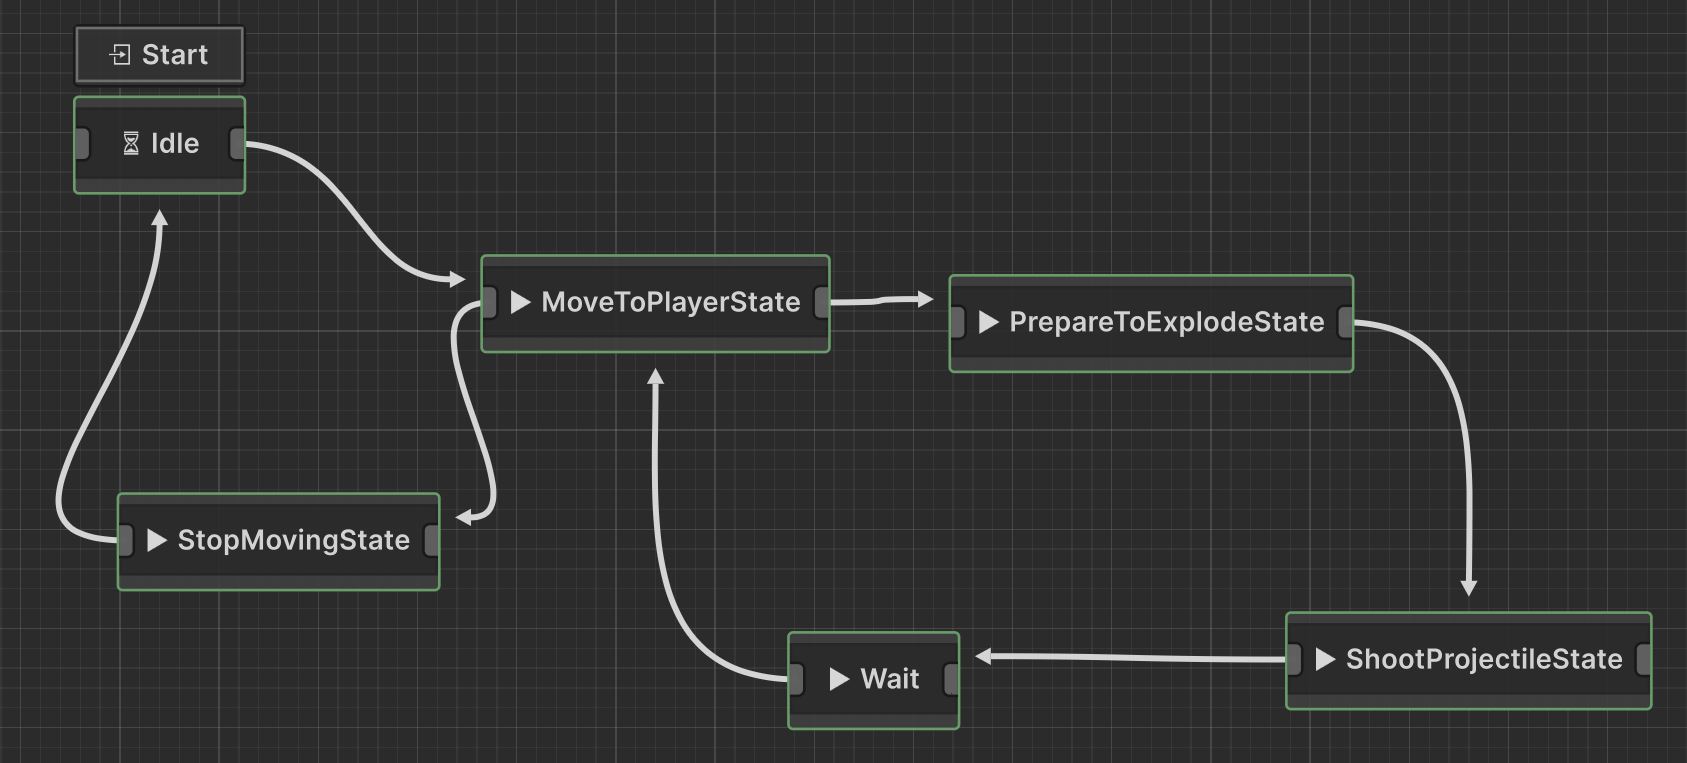
Here is the final state machine graph that controls this enemy:
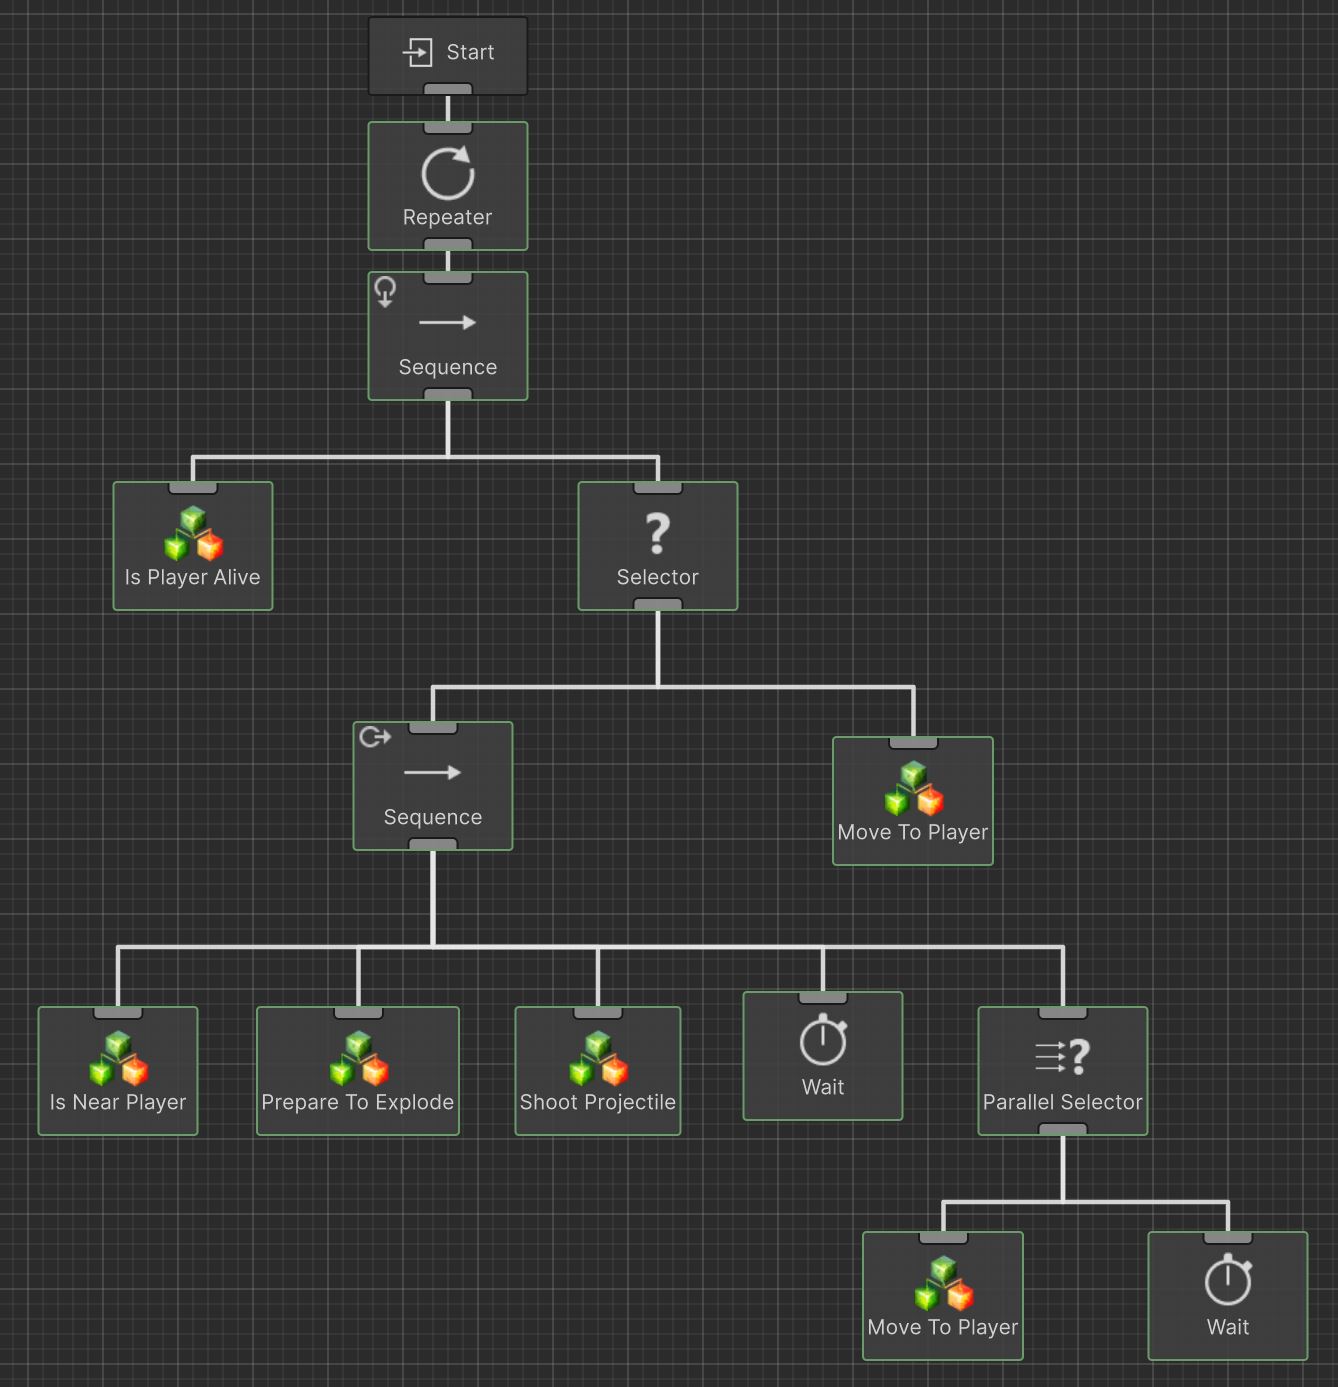
For reference, here is the behavior tree that controls this logic:
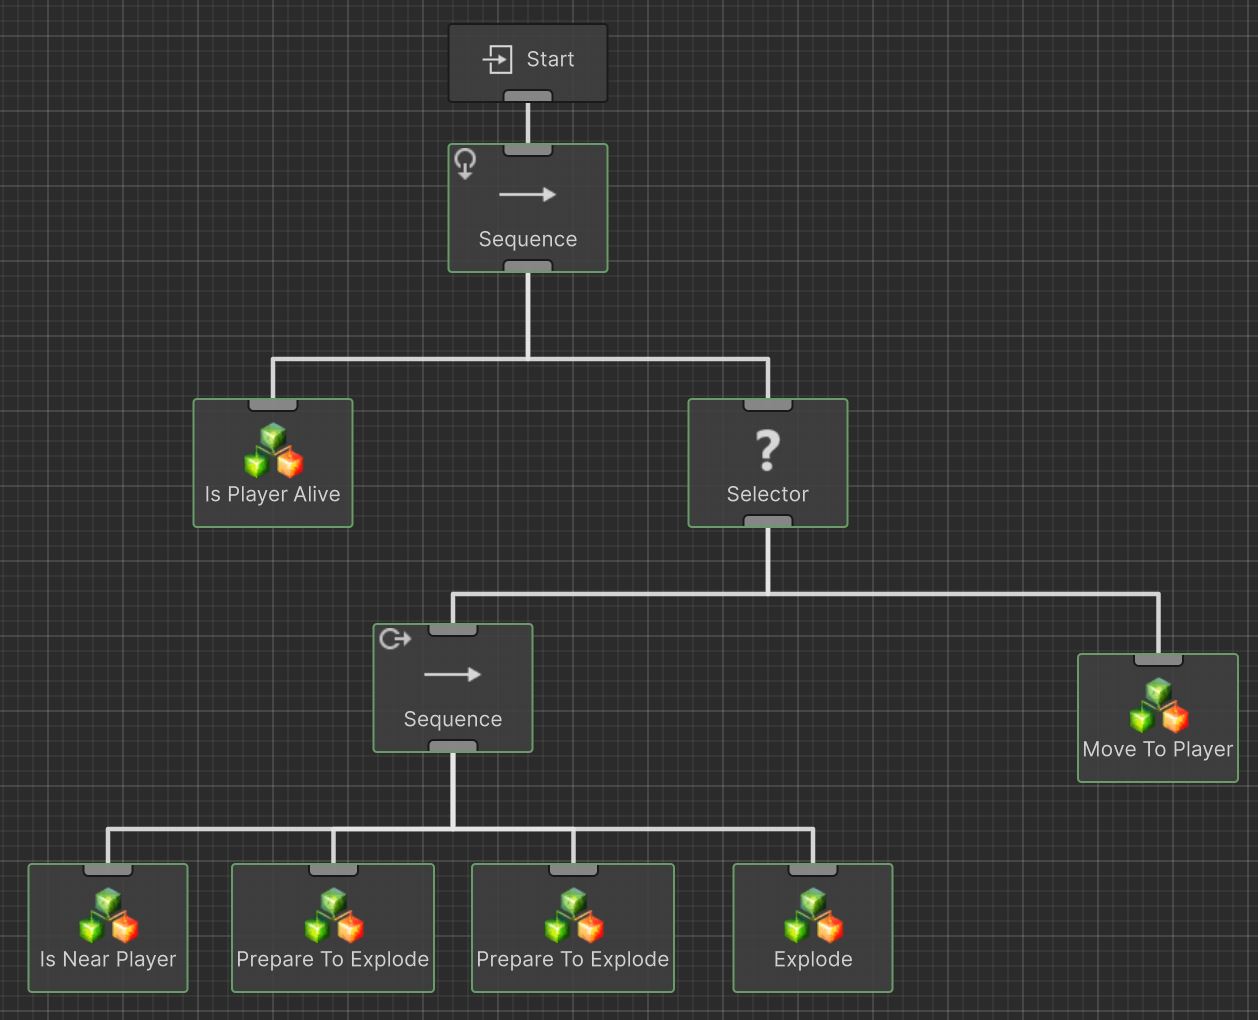
When comparing the two you will notice a few things:
The state machine graph is a bit more "flowy" and transitions have directional arrows that point from one node to another. The transitions on the behavior tree use right angles and do not have a need for arrows as they step through the tree based off defined rules.
You'll also see the state machine has fewer nodes than the behavior tree. This is for two primary reasons: 1. There are no "control" nodes (e.g. Selector and Sequence) and 2. There are no "conditional" nodes (e.g. IsPlayerAlive and IsNearPlayer).
The state machine graph lacks control nodes because with state machines we have more control over branching and control flow in the graph, while the behavior tree must adhere to defined rules of the concept of behavior trees (e.g. behavior trees always execute top-to-bottom then left-to-right).
Conditional nodes being missing is slightly misleading as the same logic is still present, however this logic exists in the transitions between the action nodes. For example, if we were to inspect the transition from the MoveToPlayerState to the first PrepareToExplodeState node, you'll see we have a condition for IsNearPlayerState where we can define the distance to be considered "near the player."
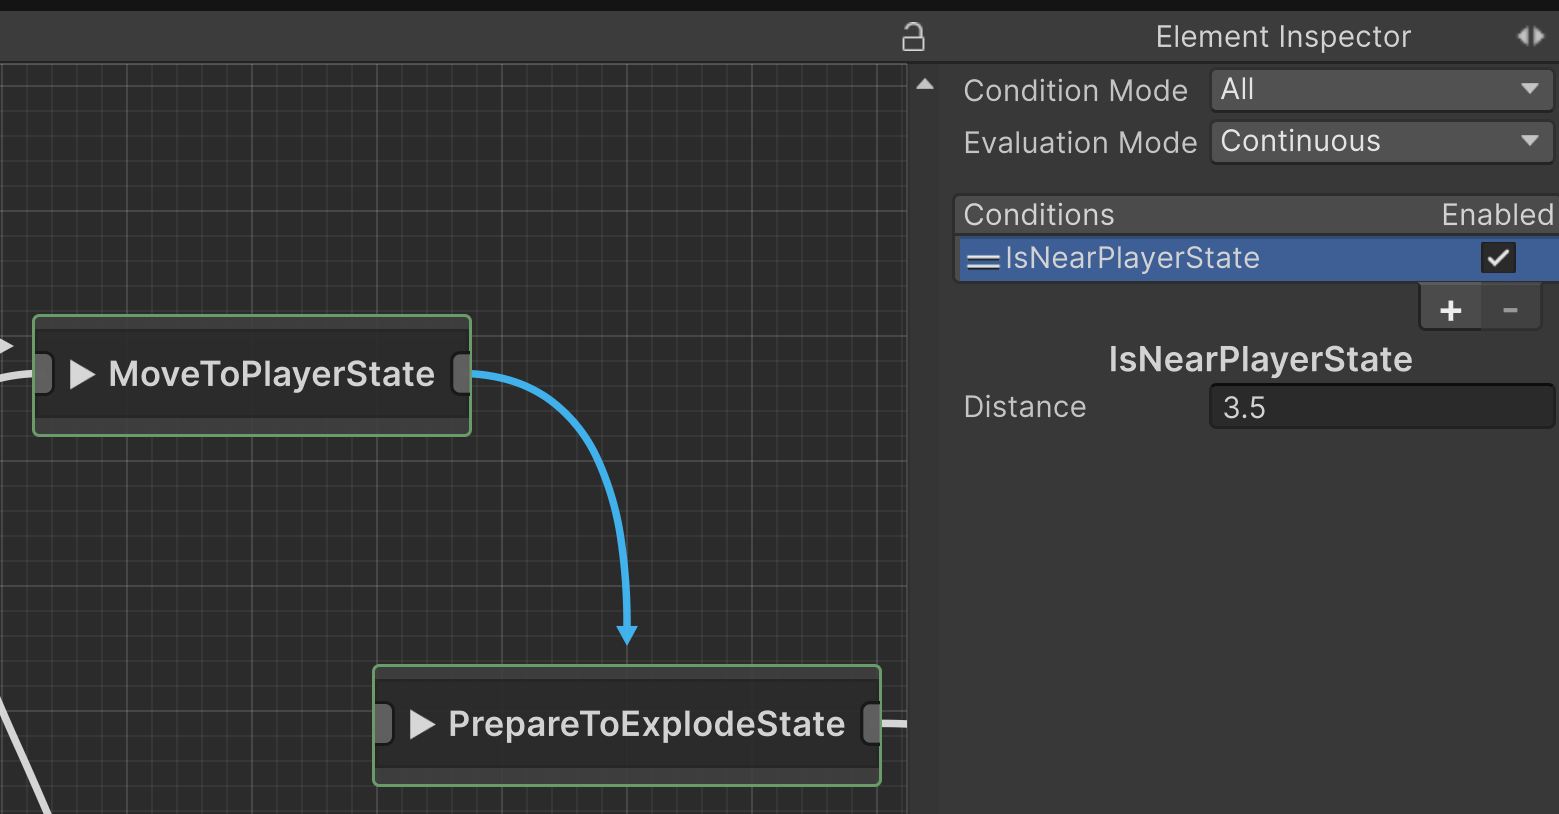
When transitioning from the first PrepareToExplodeState to the next, then to the ExplodeState the only transition present is the built in StateFinished condition which will automatically move it to the next node once we mark that state as finished in the code.
The other notable transitions are:
- From the starting
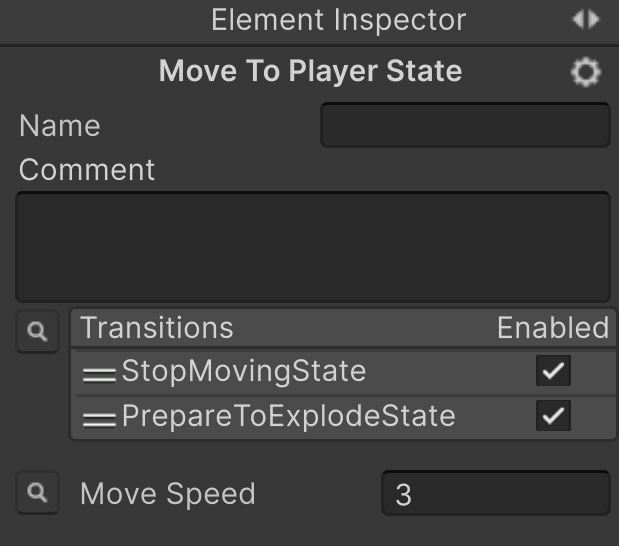
Idlenode to thisMoveToPlayerStaterequires the player to be alive. - If at any time during the
MoveToPlayerStatethat the player gets destroyed, it will transition to theStopMovingStatethen loop back up to theIdlestate.
In Behavior Designer Pro, conditional and action nodes can return a success or failure to help them determine how to proceed through the behavior tree. In State Designer, nodes can only return a "Finished" status once complete. Because of this, I did have to create two separate conditions for IsPlayerAliveState and IsPlayerDeadState while behavior designer could handle both cases in a single IsPlayerAlive that returns either a success or failure.
For something like the MoveToPlayerState that has multiple outgoing transitions, you can select that node, then drag the transitions around in the hierarchy to specify their importance. In this case, the transition to the StopMovingState has a higher precedence over the PrepareToExplodeState, so if it were to happen that both of those transitions became valid on the same frame, the graph would take the path towards the StopMovingState.
Projectile UFO Entity
The second enemy type powered by State Designer has a bit more complex logic. Here is how I want the enemy to act in the game world:
- Spawn the enemy offscreen and begin moving towards the player
- Once the player is in range
- Stop movement and indicate that the enemy is about to shoot towards the player
- Shoot a projectile towards the player
- Wait in place for a moment
- Regardless of if the player is in range, move towards the player for at least a second
- Repeat this entire logic as long as the enemy exists
Here is the state machine graph to implement that behavior:
Now compare that to the behavior tree I created to mimic the same logic:
Once again the state machine graph has significantly fewer nodes than the behavior tree; and this is due to similar reasons as the exploding UFO enemy. The lack of need for control flow nodes: note that not only do we not have Selector and Sequence nodes, but also we do not need the Repeater node as we can simply add a loop in our logic where we want our logic to repeat. And as you may have guessed, the conditional transition logic is stored in the transitions between the nodes.
This graph does do something interesting with transitions, if we select the transition between the MoveToPlayerState and the PrepareToExplodeState you'll see this transition has two conditions: IsNearPlayerState and Timer.
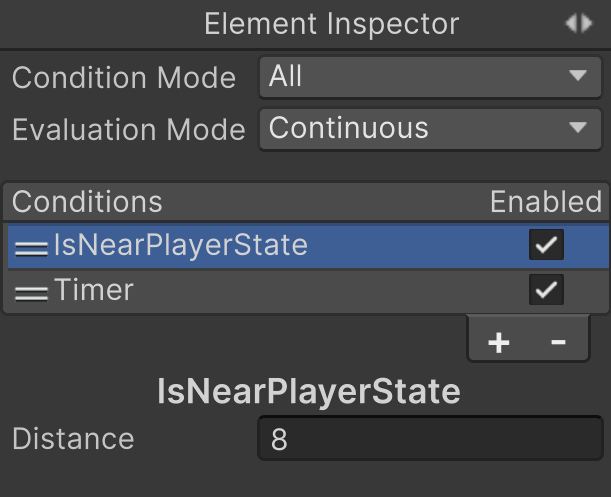
Because I have the Condition Mode set to a value of "All" this means all conditions must be met before that transition executes. Alternatively, you can set Condition Mode to "Any" meaning the transition will execute if any of of the defined conditions return true. Selecting each condition will allow you to define parameters related to that condition.
In this case, to advance, the player must be in range of the enemy and a defined time has elapsed. This is so the enemy doesn't just sit in place and continue to fire from a distance, but will continue to actively move a bit closer to the player after each shot.
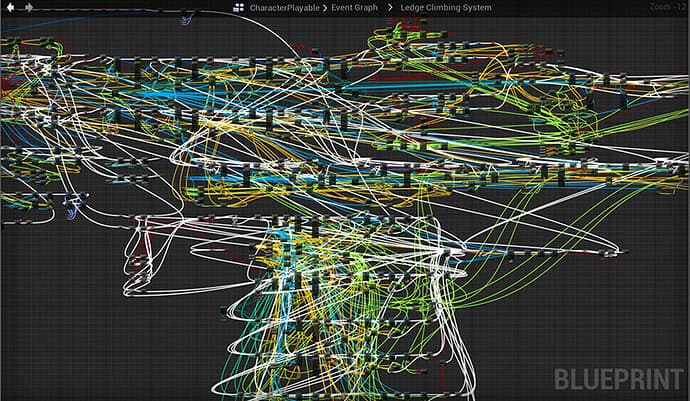
Overall, I think for these two enemy types, the state machine graph is much easier to understand as the control flow is laid out for you. For behavior trees, you do need to have a bit of knowledge related to control flow of behavior trees and how the conditional abort system works. However, as state machines grow, they can become much messier and thus more difficult to understand. I think many of us have all seen the horrors of a messy Unreal Blueprint graph: